Sunday, December 22, 2013

Leslierahye's Merry Holiday Steampunk Blog Hop - December 21st

Welcome to 
Hosted by the very lovely Leslie Rahye

I want to thank Leslie for all the wonderful things she does
Hosting Steampunk themed blog hops
Her love and passion for crafting on all levels
She inspires me more than she knows
(welp-she knows now! lol)

This years has pasted me by quickly
Many joyous moments, some disappointments, and new revelations
I am excited for what is to come in 2014 and hope that you will
still be there through this journey

My last project for 2013

3D Steampunk Xmas Tree
Found an old tattered book at my thrift store for 25 cents.
I found a tutorial through Pinterest.
I put gesso on the folded pages and started spraying
I used Lindy's Stamp Gang embossing powders, sprays and micas
Dylusions 
Used foil tape and used Tim Holtz dies and embossing folders
I bought some watch findings on www.etsy.com used Ranger's Glossy Accent to adhere the gears n cogs
found an awesome shop for the laser chip boards called www.ginasdesigns.net
the remaining embellishments are from my stash that I've collected throughout projects

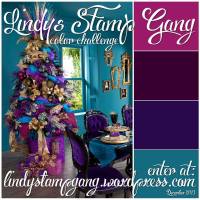
This creation is also my submission to

LINDY'S STAMP GANG INGREDIENTS
Hydrangea Blue Mauve
Cleopatra Copper
Sunrise Salmon Gold
Hyacinth Blue Jade
Tannenbaum Green
Cheshire Cat Cherry
Rizzo Rowdy Red
Frosted Purple Iris
Dolphinium Turquoise
Tibetan Poppy Teal

Happy Holidays
to each and everyone of you
Keep art alive
live your dreams
love yourself
embrace life
be free
be happy

Saturday, October 26, 2013

Leslierahye's 3rd Annual Very Spooky Steampunk Halloween Blog Hop - October 26th

Welcome to
Very excited to join Mz. Leslierahye today.  We've been blog hopping together from the beginning and want to thank her for being such and active inspiration in my life.  Since we've met via internet we just clicked and our eclectic sense of designs and creations just gelled.  So I am honored to and humbly thankful being here.

New changes ladies and gents (if any out there lol).  I think I've found my niche and am going to run with it a big bounds.  No turning back. I've held myself back for too long.  I'm excited and hope that you will join me in my new journey in my life.

Enough of all that.  Let's start this blog hop.  Well, let me tell you when it came to this final design I was gearing towards making something totally different.  I saw a pic somewhere on the web (ha I said web - tells ya'll something) of this bad ass tree and one of the techniques was dripping hot glue on the branches.  Can you believe I cannot remember the web site.  I thought linked with her for new inspiration and for the life of me cannot find it.  Most of the times I print out the image and website reference to give individuals their shout out and thank them for being such an inspiration...  Just can't find it. So... I came up with what I could remember and caught my eye in the first place and designed this.

Steampunk Haunted Candles
I have see many friends and YouTubers creating dimensional wonders with Graphic 45, Pion, Prima Marketing, DCWV, BoBunny and the list goes on and on.  I've come to realize I cannot buy EVERYTHING that comes out.  Hey I'm feeling the notches in the belt and it's way too tight to get brand new. Many things you may see will be years and seasons ago and I'm okay with that.  I must admit that I look around my craft room and have plenty that would last me till the day I die.  I may go out for the necessary tools or replenishment but to have that "I gotta have the latest" days of impulse buys has diminished tremendously. Enough of  that...


I like to recycle so I kept paper towel rolls and had a foam board I wasn't using and cut a circle created the base board overed with the DCWV Tattered Times. I used white light chipboard and covered it with foil tape (my fav tool in my work areas) ran them through my Big Shot using a varity of Tim Holtz embossing folders
I brushed some Jaguard paints and black gesso. Blasted heat to them and wiped them down with a baby wipe to reveal the faux grungy industrial metal effect. I arranged my rolls and hot glued them to the base.
Oh! The fun part is dripping the hot glue around the rim to give the illusion of melted wax.
I pulled out my dies and started cranking and punching. By the way cheese cloth has become close friend lately. It's a pretty diverse piece of material from the kitchen to the craft room. I also had the opportunity to use things I had not had the chance to play with . Bad Jessica (in third person voice) - I am totally kidding and I hope my sense of humor doesn't offend anyone.  Call me a geek. lol.


I found some skulls and a mini coffin in my wonderland stash.  I love Tim Holtz dies that has the little tricker treaters and rows of houses - Instead used a fun Fiskar's border punch that went on clearance 2 seasons ago. Works for me. Number washi tape from a dollar bind at Michael's


Mulberry flowers from stash

I also enjoy the use of  Stampedous Essential Fran-tage Embossing Kit 
I hope you are enjoying my creation and having a blast hoppin. 

I have yet to pick a winner for my last hop and I apologize for that.  I will announce a winner of the steampunk wreath next week.  I'm giving away this fun project for your goulish halloween decor.

BLOG CANDY


All you need to do
Hop on each blog
Leave a comment on each blog
Follow if you're not following
Easy Peasy Ya'll

Don't forget to go back to back to Leslierahye's blog to download that fabulous steampunk ghost digi designed by Vince.

Thanks for stopping by

Friday, October 25, 2013

All Things Altered Fall/Halloween Blog Hop - OCTOBER 25th-27th

Hello and Welcome
to the 3rd Annual
If you just left BARBARA then you are in the right place
If you would like to start at the beginning click HERE

I love wall decor and could not help but to create
mixed media piece to celebrate a new harvest to come.
Although I am not a fan of cold weather I enjoy
seeing nature change it colors
Sorry that I did not take pictures of my process. 
 Sometimes I really get into
my projects and my hands are full of inks and textured materials 


I hope you liked what I have created

INGREDIENTS
8X10 Canvas
Molding Paste - Vine Stencil
Tissue Paper, Cheese Cloth
Modge Podge - Medium Gel
Image - Urban Threads - Autumn Wheat
Stampedious - Frantage Embossing Kit
Chipboard letters - Embossing folder
Tsukineko Goosebump Texture
Ink Sprays - Tim Holtz Adirondack color wash sprays and Lindsy's Stamp Gang Sprays
Jacquard paints - burnt orange, bronze
Leaves - Recollections Mulberry Flowers - Personal Stash
Faber-Castell - Pitt Artist Pen
Silver marker

GIVE AWAY
Pam is also giving away some yummy blog candy
HOW TO WIN!!!
Hop on each blog
Leave a Comment on each blog
Become a follower
Return to PAM's Blog
Easy Peasy

Next on the hop is 
I know that her designs will knock your soxs off

Thursday, October 24, 2013

Creative Paperclay® Final Design

Hello Everyone,

This will be my last project with Creative Paperclay® on October 17th. I've enjoyed every
moment sharing and creating with this awesome design team for two terms.

I've learned many fun techniques with Creative Paperclay® and know that
this will be an essential tool to have in my stash.

Octopus!


Thank you Terri Sproul and Creative Paperclay®  for allowing me
to be a part of the family and creating new friends along the way.

The new design team is going to wow you!


Saturday, October 5, 2013

Creative Paperclay Link Up Party and Design Team Submission

Hello Everyone
Welcome to my blog!
If this is your first time welcome and 
I hope you stay enjoy looking around
My name is Jessica Baker also know as Jess B.

I am participating in Creative Paperclay® Halloween Link Up Party
and also crossing my fingers to continue my fun journey with this awesome design team.
Fairy Tales
seems to be all the rave on prime time
and it has found its way to my heart
Once Upon at Time....
INGREDIENTS
Background Props - Cricut Cartridge - Happy Hauntings and India
Paper Mache Ball (Apple)
Paper Mache Chest
Acrylic Paints - MS Mint, Glitz Red
Wilton - Heart candy mold
Lindys Stamp Gang Spray - Rhodoendron Red Rose
Ranger Adirondack color wash spray - Red Pepper
Apple
Took the paper mache ball and Creative Paperclay® and rolled for
balls for the bottom of the apple. Rolled out another sheet of Creative Paperclay® and wrapped around the ball and shaped it into an apple. Once completely dry I sanded it down smooth down
the roundness of an apple. I sprayed with adirondack color wash spray red pepper and sprayed LSG spray
Poison Goop
I took Delight® and added acrylic paint, Rolled out and lay right on top of apple to form the skull like impression
Chest
I rolled out more Creative Paperclay® and added dimension to the chest all around and on top
I also impressed an embossing folder 
I painted  red inside and out
Heart
I rolled Creative Paperclay® and place into a candy mold heart.
let dry and colored and spray same as apple
I also added some embellishments from my stash

I am pleased with the outcome. TOTAL FUN and will be placed in my case of goodies.


a kind
VOTE FOR ME
from you would be awesome

Thanks for stopping by. Make sure you stop on by the Creative Paperclay® Blog 
and see what everyone is creating.

....